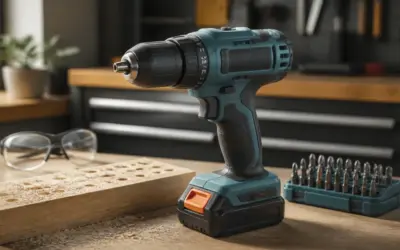

Learning how to choose a drill bit for any material starts with identifying what lies beneath the surface. A bit designed to cut wood may skate across tile, while a masonry bit can tear fibers and leave a rough hole in lumber. Before drilling, confirm the base material, required hole size, hole depth, finish quality, and compatibility with your drill.
Answer-first summary: Match the bit’s cutting geometry to the base material, not merely the visible finish. Use brad-point, twist, spade, auger, or hole-saw designs for appropriate wood tasks; sharp twist bits for metal and plastic; carbide-tipped masonry bits for brick or concrete; and purpose-made tile or glass bits for brittle finishes. Always check for concealed utilities first.
Start with the material beneath the surface
A wall, floor, cabinet, or countertop may contain several layers. Painted drywall might conceal a wood stud, metal framing, pipe, or cable. Tile may be installed over backer board, masonry, or a framed wall. Laminate may cover particleboard or plywood. The correct setup therefore depends on every layer the bit must cross.
Inspect an exposed edge, underside, unfinished opening, or existing hole when possible. Building plans and a suitable scanner can provide additional clues, but they do not replace cautious investigation. If the route is uncertain, a small inspection opening or a camera may help. Home DVP’s guide to choosing a borescope for home inspection explains where visual access tools can be useful.
Do not drill simply because a detector gives no warning. Detection performance varies with the wall assembly, depth, moisture, and tool. Stop if you have reason to suspect hidden electrical wiring, plumbing, gas piping, heating components, waterproofing, or structural reinforcement and cannot establish a safe drilling path.
Drill-bit types and their best uses
| Bit type | Typical material or task | Important limitation |
|---|---|---|
| Standard twist bit | Metal, plastic, and general-purpose drilling; some versions also handle wood | May wander or leave a rough entry in wood without careful starting |
| Brad-point bit | Clean, accurately positioned holes in solid wood and wood-based panels | The center point and outer spurs are not intended for masonry or metal |
| Spade bit | Fast, relatively large holes in framing lumber | Can splinter the exit face and is not intended for fine finished work |
| Auger bit | Deep holes in wood where chip removal matters | The feed screw can pull aggressively and may be unsuitable near a board edge |
| Hole saw | Large circular openings in wood, sheet metal, plastic, or tile when fitted with the correct cutting edge | The cup, pilot bit, arbor, drill, and material must all be compatible |
| Masonry bit | Brick, mortar, block, and concrete | Not the right choice for wood, metal, glass, or most finished tile surfaces |
| Tile or glass bit | Brittle glazed surfaces when the bit is explicitly rated for them | Usually requires controlled pressure and the drilling method specified by the bit maker |
| Step bit | Progressively enlarging holes in suitable thin sheet material | Not intended for deep holes or thick stock |
Names alone are not enough. Two visually similar bits may have different cutting materials, coatings, shank designs, or permitted drilling modes. Read the package or manufacturer’s instructions for the exact bit. Treat speed, cooling, impact-mode, and maximum-capacity statements as model-specific specifications rather than universal rules.
How to choose a drill bit for any material step by step
- Identify all layers. Determine whether you are drilling solid wood, sheet metal, masonry, plastic, tile, glass, or a layered assembly.
- Define the hole. Decide whether it is a pilot hole, clearance hole, countersunk opening, anchor hole, through-hole, or large cutout.
- Match the final size. For screws, anchors, and hardware, follow the hardware manufacturer’s specified hole and bit size. Do not estimate from appearance.
- Choose the cutting geometry. Select a wood, metal, masonry, brittle-surface, or hole-cutting design that is explicitly suitable for the base material.
- Check the shank and chuck. Confirm that the drill accepts the bit’s shank style and can hold it securely. A dedicated rotary-hammer shank does not fit every ordinary drill chuck.
- Confirm the drilling mode. Use ordinary rotation, hammer action, or another mode only when both the bit and material instructions permit it.
- Plan chip and dust control. Consider how debris will be collected and whether the manufacturer calls for cooling or lubrication.
- Make a controlled start. Secure the work, begin without excessive force, and pause if the bit binds, overheats, or stops cutting normally.
Choosing bits for wood and wood-based panels
For accurately placed holes in visible wood, a brad-point bit is often easier to locate because its center point resists wandering. A sharp twist bit may be adequate for general work. Spade and auger bits are more appropriate when speed or depth matters more than a furniture-grade entry and exit.
Thin veneers, laminate, plywood, particleboard, and fiberboard can chip or break out differently from solid lumber. Support the back face with scrap material when access allows, and avoid forcing a dull cutter. A hole saw can produce a large opening, but its pilot bit may emerge before the saw reaches the far face. Check the opposite side and the space behind it first.
When installing a screw, distinguish between a pilot hole and a clearance hole. A pilot hole guides the threaded section into the receiving material. A clearance hole allows the screw to pass through the first piece so the pieces can pull together. Use the fastener manufacturer’s instructions when they specify a bit size, especially for structural connectors or specialty hardware.
Choosing bits for steel, aluminum, and other metals
Use a sharp bit expressly rated for the particular metal. General-purpose twist bits are common, while step bits and purpose-made hole saws can suit some sheet-metal tasks. The appropriate cutting speed, feed pressure, and lubricant depend on the bit, metal, thickness, and drill, so follow the relevant manuals instead of assuming one setting works universally.
Clamp loose work securely. A handheld metal piece can catch the bit and spin, and thin sheet can have sharp edges. If the bit squeals, discolors, produces little material, or requires rapidly increasing pressure, stop and check whether it is dull, incorrectly operated, or unsuitable. Remove long chips only after the drill has stopped, using a method that keeps hands away from sharp swarf.
Choosing bits for brick, mortar, block, and concrete
A carbide-tipped masonry bit is the usual starting category for mineral masonry. Dense concrete or a larger, deeper hole may require a rotary hammer and a compatible bit rather than an ordinary drill. Verify the tool’s capacity and bit shank in its manual. If reinforcement is encountered, do not assume it is safe to cut because it may be structural or conceal another hazard.
Decide whether the anchor is intended for the masonry unit or the mortar joint. That choice is project- and fastener-specific. Follow the anchor maker’s instructions for substrate, hole dimensions, cleaning, edge location, and installation. Poor dust removal or an oversized hole can compromise some fastening systems, but the required procedure varies by product.
Masonry drilling creates dust and can expose concealed services. Use the dust-control method, respiratory protection, and personal protective equipment identified by the tool, bit, material, and workplace instructions. For broader occupational hazard information, consult NIOSH safety resources. Homeowners should not treat general guidance as a substitute for instructions covering a specific material or exposure.
Choosing bits for tile, stone, and glass
First determine whether the surface is ceramic tile, porcelain, natural stone, engineered stone, or glass. These materials do not drill alike. Select a bit whose manufacturer specifically lists the surface. Some bits are designed for dry use, while others require a prescribed cooling method. Follow that instruction and keep water away from electrical connections and tools not approved for wet operation.
Start with controlled pressure to reduce skating and surface damage. Do not activate hammer mode on a brittle finished surface unless the tile and bit manufacturers explicitly permit it. Once the finish is penetrated, the backing material may require a different bit. For example, a tile-facing bit may cross the glaze, followed by an appropriate masonry or wood bit for the substrate.
Drilling near a tile edge, fitting, existing crack, or waterproofed shower assembly carries added risk. A penetrated waterproofing layer can cause hidden moisture problems. Obtain the assembly manufacturer’s approved fastening and sealing method, or call a qualified tile or waterproofing professional when the assembly cannot be identified.
Choosing bits for acrylic, PVC, and other plastics
Plastics vary widely. A standard sharp twist bit may work for some materials, while brittle sheet can crack and heat-sensitive plastic can soften around the hole. Use a bit recommended for the exact plastic when possible, support the work fully, and avoid excess pressure. Manufacturer instructions should govern speed, backing, cooling, and edge clearances.
Do not assume plastic pipe is safe to drill. Supply, drain, gas, irrigation, and conduit systems have different purposes, and penetrating an installed line can cause flooding, contamination, shock, fire, or other hazards. If an unknown plastic component is concealed in a wall or floor, identify it before proceeding.
Worked decision example: mounting a bracket on a tiled wall
Scenario: A homeowner wants to mount a bracket through glazed tile, but the backing is unknown. The first decision is not which bit to buy. It is whether the wall contains a suitable fastening point and whether drilling could damage plumbing, wiring, or waterproofing.
- Inspect the other side of the wall, nearby fixtures, visible service routes, plans, and accessible openings.
- Identify the tile and, as far as practical, the substrate. Do not rely only on the surface appearance.
- Select the fastener based on the bracket load and confirmed substrate, using the fastener and fixture instructions.
- Choose a bit expressly rated for the tile surface and the required hole. Plan a separate substrate bit if necessary.
- Confirm that hammer mode is off while crossing the brittle finish unless the instructions state otherwise.
- Use the approved sealing method if the wall is part of a wet-area assembly.
- Stop and obtain professional help if the concealed route, waterproofing method, or load-bearing substrate remains uncertain.
This example shows why one universal bit cannot solve every job. The visible tile determines the entry tool, the backing determines the anchor and subsequent bit, and the concealed conditions determine whether drilling should happen at all.
Pre-drilling safety checklist
- Read the drill, bit, fastener, and material instructions.
- Confirm the work area does not present an unresolved utility or structural hazard.
- Inspect the drill, plug, battery, chuck, bit, and accessories for damage.
- Remove the battery or disconnect power before installing or changing an accessory.
- Secure loose work with an appropriate clamp or fixture.
- Wear eye protection and any other protective equipment required for the material and operation.
- Keep loose clothing, hair, jewelry, and hands away from rotating parts.
- Use electrical equipment only in conditions allowed by its instructions.
- Maintain balanced footing and position yourself for a possible bind or kick.
- Let the bit stop completely before setting the drill down or clearing debris.
The CPSC home power-tool safety checklist emphasizes inspecting tools, using appropriate protective equipment, keeping guards in place, and disconnecting power before changing accessories. The agency’s electrical safety checklist also provides practical checks for damaged cords, plugs, outlets, and other electrical hazards.
If the drill itself is unsuitable for the required material or bit, do not compensate with more force. Compare chuck type, operating modes, capacity, ergonomics, and manufacturer-approved accessories. Home DVP’s overview of a cordless drill for home use can help explain the tool-side choices, while the broader Tools and DIY section covers related equipment.
Common mistakes that damage bits or materials
- Choosing by color alone: Coatings and finishes can look similar. Read the material rating on the package.
- Using a masonry bit on every hard surface: Tile, glass, metal, and concrete need different cutting actions.
- Forcing a dull bit: Added pressure reduces control and does not restore a worn cutting edge.
- Leaving hammer mode engaged: Impact action can damage brittle finishes and is inappropriate for many bits.
- Ignoring the exit side: The bit may strike a hand, finished surface, cable, pipe, or nearby object as it breaks through.
- Estimating an anchor hole: Hole requirements come from the specific fastener instructions.
- Mixing incompatible systems: A bit may fit loosely enough to appear usable while still having the wrong shank, arbor, or chuck interface.
- Continuing after an unexpected change: Sudden resistance, vibration, smell, heat, or leaking is a reason to stop and investigate.
Bit condition, storage, and maintenance
Clean debris from bits after use according to the manufacturer’s directions, dry bits that have been exposed to approved cooling methods, and store cutting edges so they do not strike one another. Inspect tips, flutes, pilot points, shanks, hole-saw teeth, and arbors before reuse. Replace damaged accessories rather than trying to straighten or improvise repairs.
A bit that has become difficult to control, visibly chipped, bent, badly worn, or unable to cut under its normal operating method should be removed from service. Some cutting tools can be professionally sharpened, but sharpening changes geometry if done incorrectly. Follow the maker’s maintenance guidance or use a competent sharpening service.
When this advice does not apply
General household guidance is not enough for post-tensioned concrete, structural steel, engineered beams, fire-rated assemblies, asbestos-containing or suspect materials, medical or laboratory surfaces, pressure vessels, utility infrastructure, or locations with special permitting requirements. Rental agreements and building rules may also prohibit penetrations even when the physical drilling method appears straightforward.
Stop and call an appropriate qualified professional if you cannot identify concealed services, encounter possible structural reinforcement, smell burning, see sparks, cause a leak, find damaged wiring, suspect hazardous material, or cannot verify how a waterproofed or fire-rated assembly should be restored. Turn off and isolate an affected utility only if you can do so without entering the hazard.
Final action: how to choose a drill bit for any material
Write down four items before opening the toolbox: every material layer, the required hole and fastener, the drill’s chuck and operating modes, and the concealed hazards. Then select a bit explicitly rated for the first material, confirm what is needed for subsequent layers, and follow the most restrictive relevant instruction. If any layer or hazard remains unknown, investigate rather than drilling experimentally.
How we prepared this guide
This guide synthesizes common drill-bit applications into a practical homeowner decision process. Its safety recommendations were checked against the cited CPSC and NIOSH official guidance. It does not represent hands-on product testing. Bit ratings, drill settings, cooling methods, fastener-hole requirements, and maintenance details are manufacturer-specific and should be confirmed in the applicable manual.